Jump to section

Gummi
Nov 24, 2023 · 7 min read
Maps & Fog of War
When it's time to fight you might want to show your players a map. Set the scene, plan your tactical approach and roll the die to determine your fate. In Quest Portal you can easily upload your own battle maps or select from our library of premade maps.
Maps can be a great way for a Game Master to provide a visual aid not only for battles, but also for exploration.
Adding a new map
To add a new map you have two options:
1) Upload your own
2) Select a premade map.
Uploading a map
To get a new map into your session you can upload it by dragging it onto your session screen or by creating a new scene.
Drag and drop a file to upload
You can upload a new map by dragging the file onto your session screen. It will show an option to upload as a token or a scene. Choose the upload a new scene option.
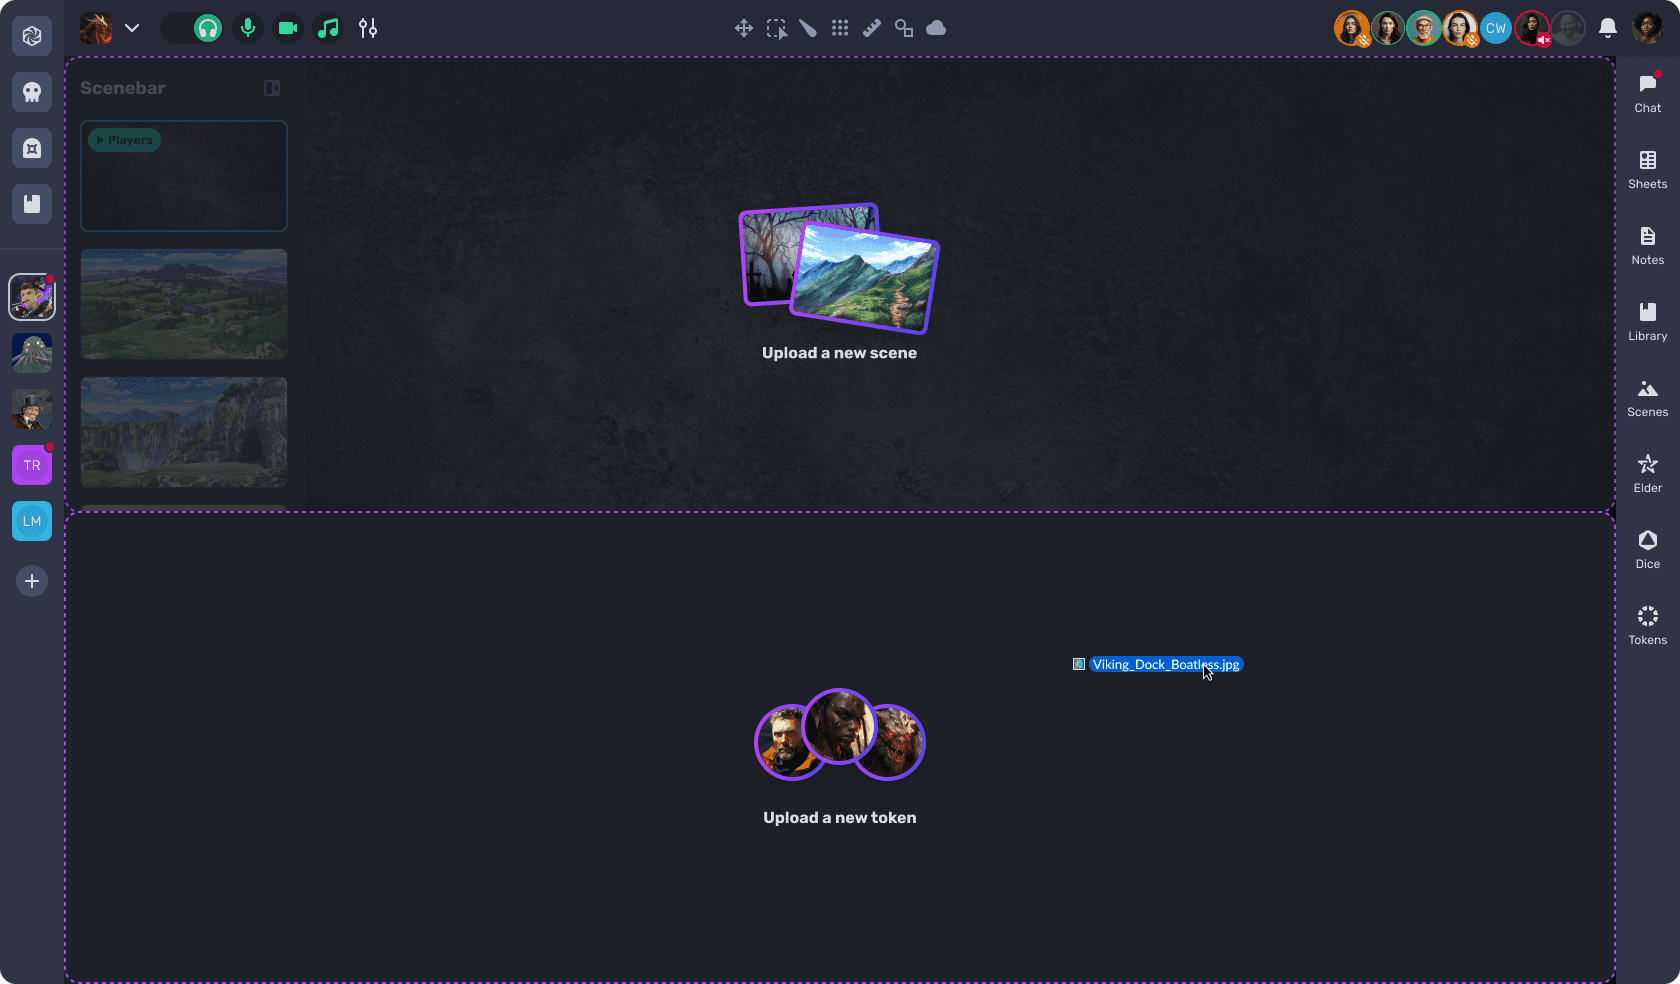
After the upload completes you will see the map in your scene deck on the left side of your screen.
We recommend editing the scene to add some music.
Creating a new scene from scratch
You can also add a map by creating a scene from scratch. Go into the Scenes tool. This will open the scene gallery with all the premade scenes. There you can create a new scene.
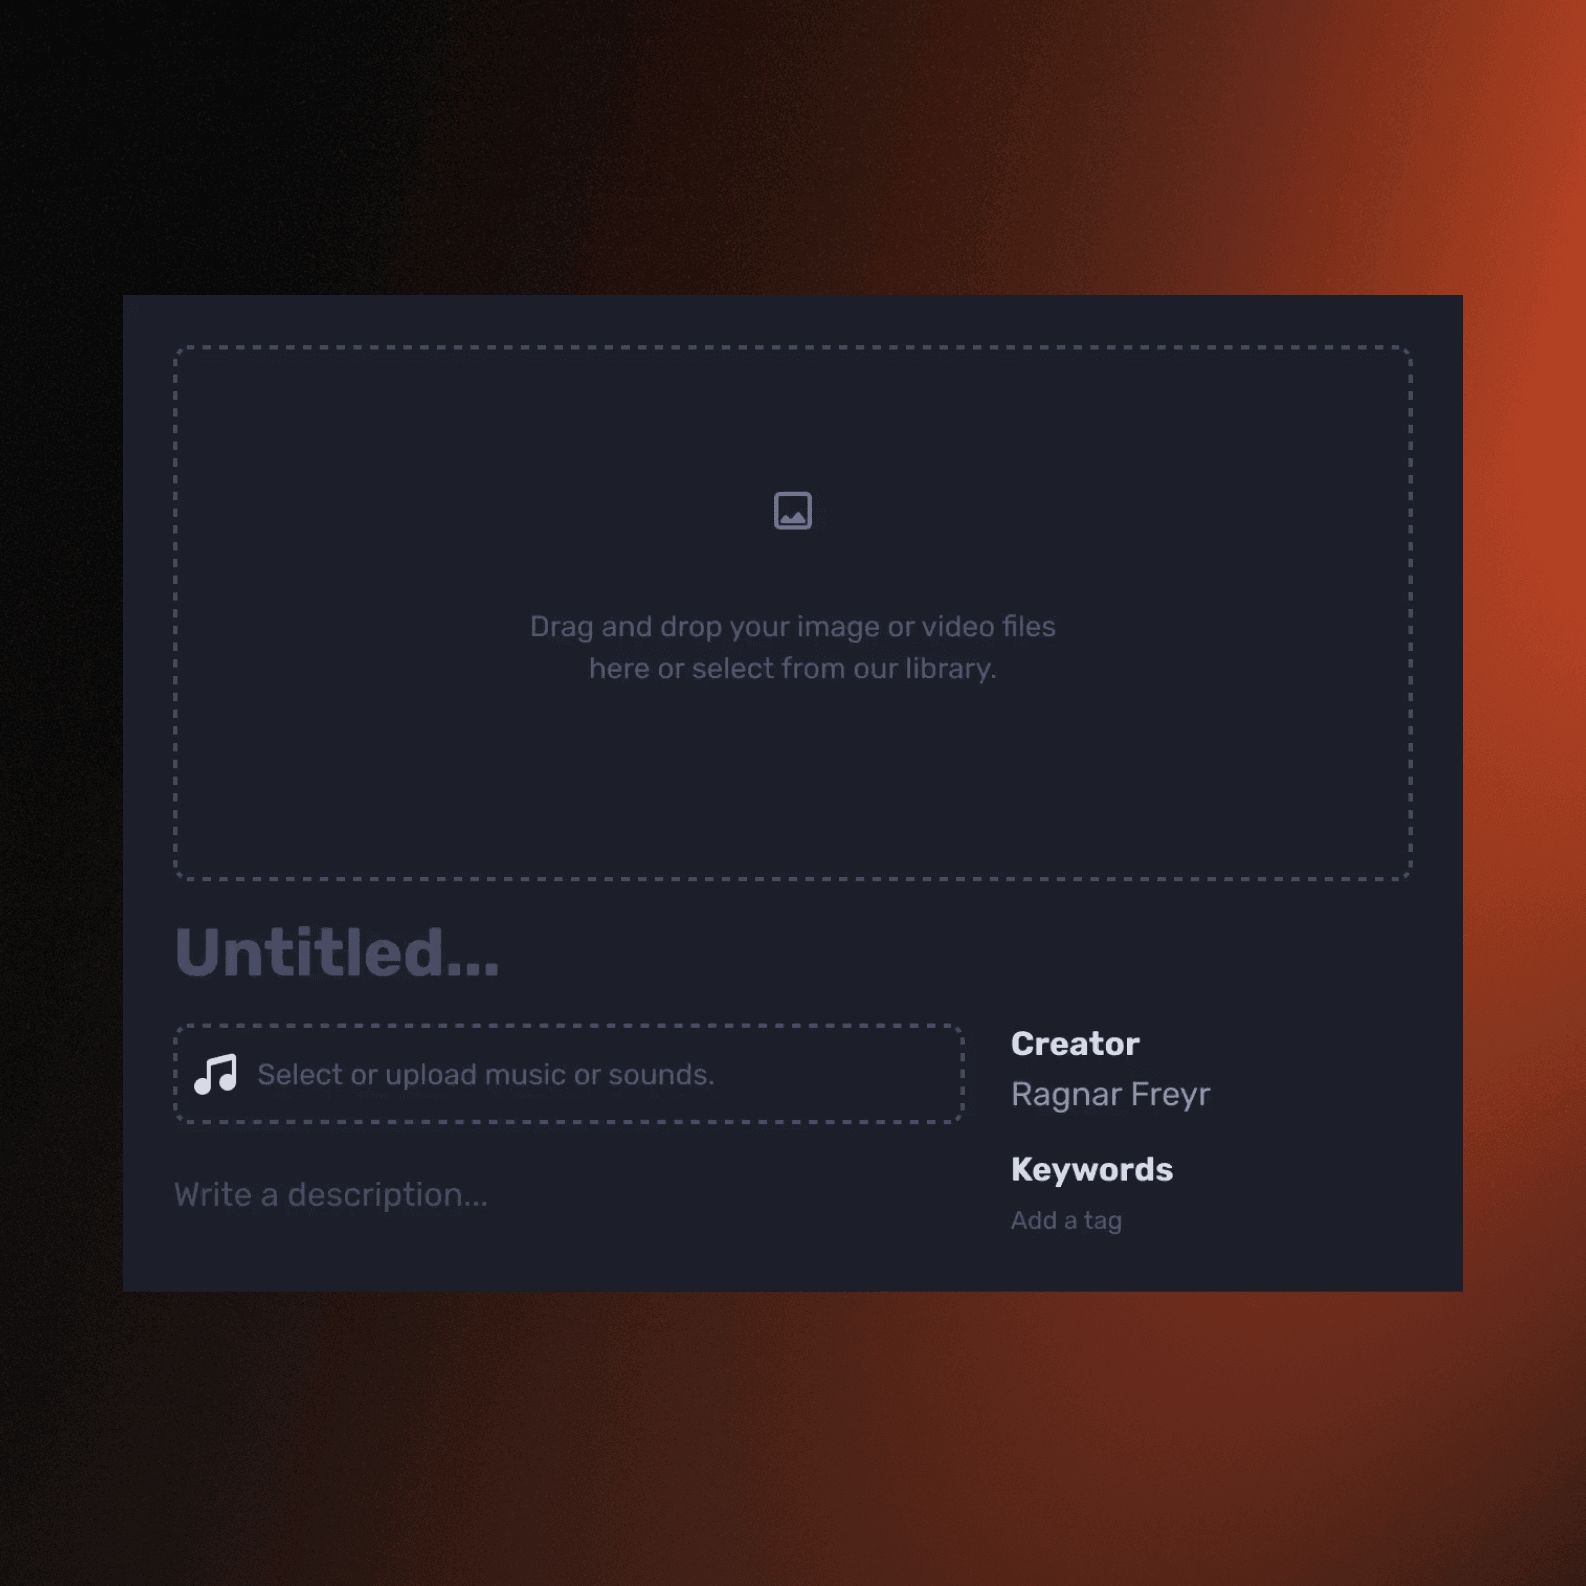
You can drag and drop your files into the big box at the top or click the box to open options to select a premade visual or upload your own. Select the upload option if you aim to get your own map uploaded.
Once the upload is done you will see the preview image. From this screen you can also add soundtracks to the scene and write a description. You can even upload multiple files if you want to have variants of the map (for example a day vs. night version).
For a run through on Session tools like these, the Checklist tutorials can help explain these in more depth, or checkout the Youtube playlist for a video guide.
Map tools
Once you have added your custom map you can start adding things. From the session screen you will see tools at the top of the screen that we call Map tools.

Fog of war
The first tool to note is the Fog of War tool ('F' keyboard shortcut). This allows you to hide certain areas of your newly added map.
To start, click the cloud icon to start using the Fog of War tool. When enabled you will see a few options to choose from.
The first is a toggle. Green + allows you to add Fog of War, and a red - allows you to remove fog of War. When adding, the boundaries are dark, and when removing, the boundary is red.
There are two types of tools for Fog of War: Polygon and Square. The tool selected will be a pale blue color.
Polygon
Symbol: Two lines with three squares. To use, click onto the canvas area and keep clicking at each corner of the shape you want to create. To close the shape, click on the original point of the Polygon.
Square
Symbol: Filled square. To use, Left click + drag until you have the size and shape of the square that you want. Then let go of the click.
Reveal All
Symbol: Trash can. This removes all the fog from the canvas, revealing the entire image or map.
Player Preview
Symbol: An eye. This feature allows you to preview what the fog looks like from the player's perspective.
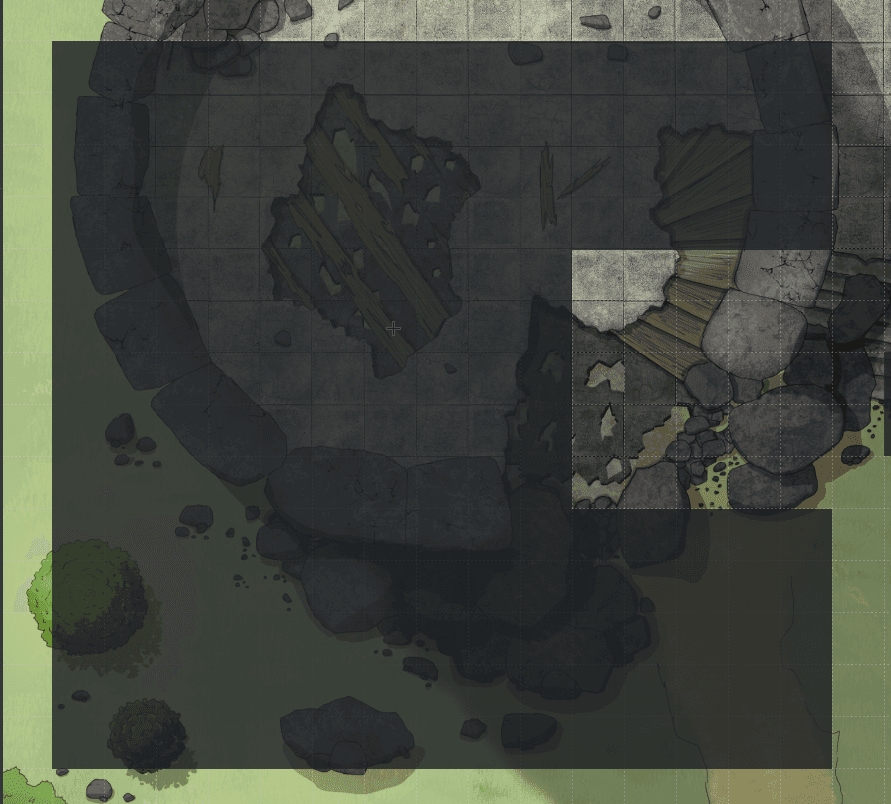
Tokens can also be used a light sources and can allow a player vision within a Fog of War.
Walls & advanced lighting
Next tool to explore is the Walls tool. By adding walls to structures you have the option of using advanced lighting instead of revealing fog manually.
The Walls tool can be enabled by clicking the wall icon ('W' keyboard shortcut). In the submenu you will have the option of applying walls, erasing walls, and clear all walls.
When adding walls you can click on a point on the map to start placing a wall, then the next point you click will create a line between the two points. This is your first wall. You can continue clicking to another point on the map until you have created the walls you want. When you want to stop adding walls you can click the last wall point you made again.
Use the eraser subtool to remove a single continuous wall. Use the trash/clear subtool to remove all walls.
NOTE: Walls currently only block vision/light, they do not block movement. Tokens can move through walls.

To take full advantage of advanced lighting then you need to:
- Apply Fog of War over the area to be hidden -> View step.
- (Optional) Apply Walls to the structures you want to obscure from vision.
- Add a Token to the map -> View step.
- Give the Token vision or a light source -> View step.
- Move token about and confirm things are revealed as expected.
Grid tool
Maps are often divided into grids. The gridlines can be visible or not on the actual image. In either case, we recommend using the Grid tool ('G' keyboard shortcut) to align the internal grid lines on your map.
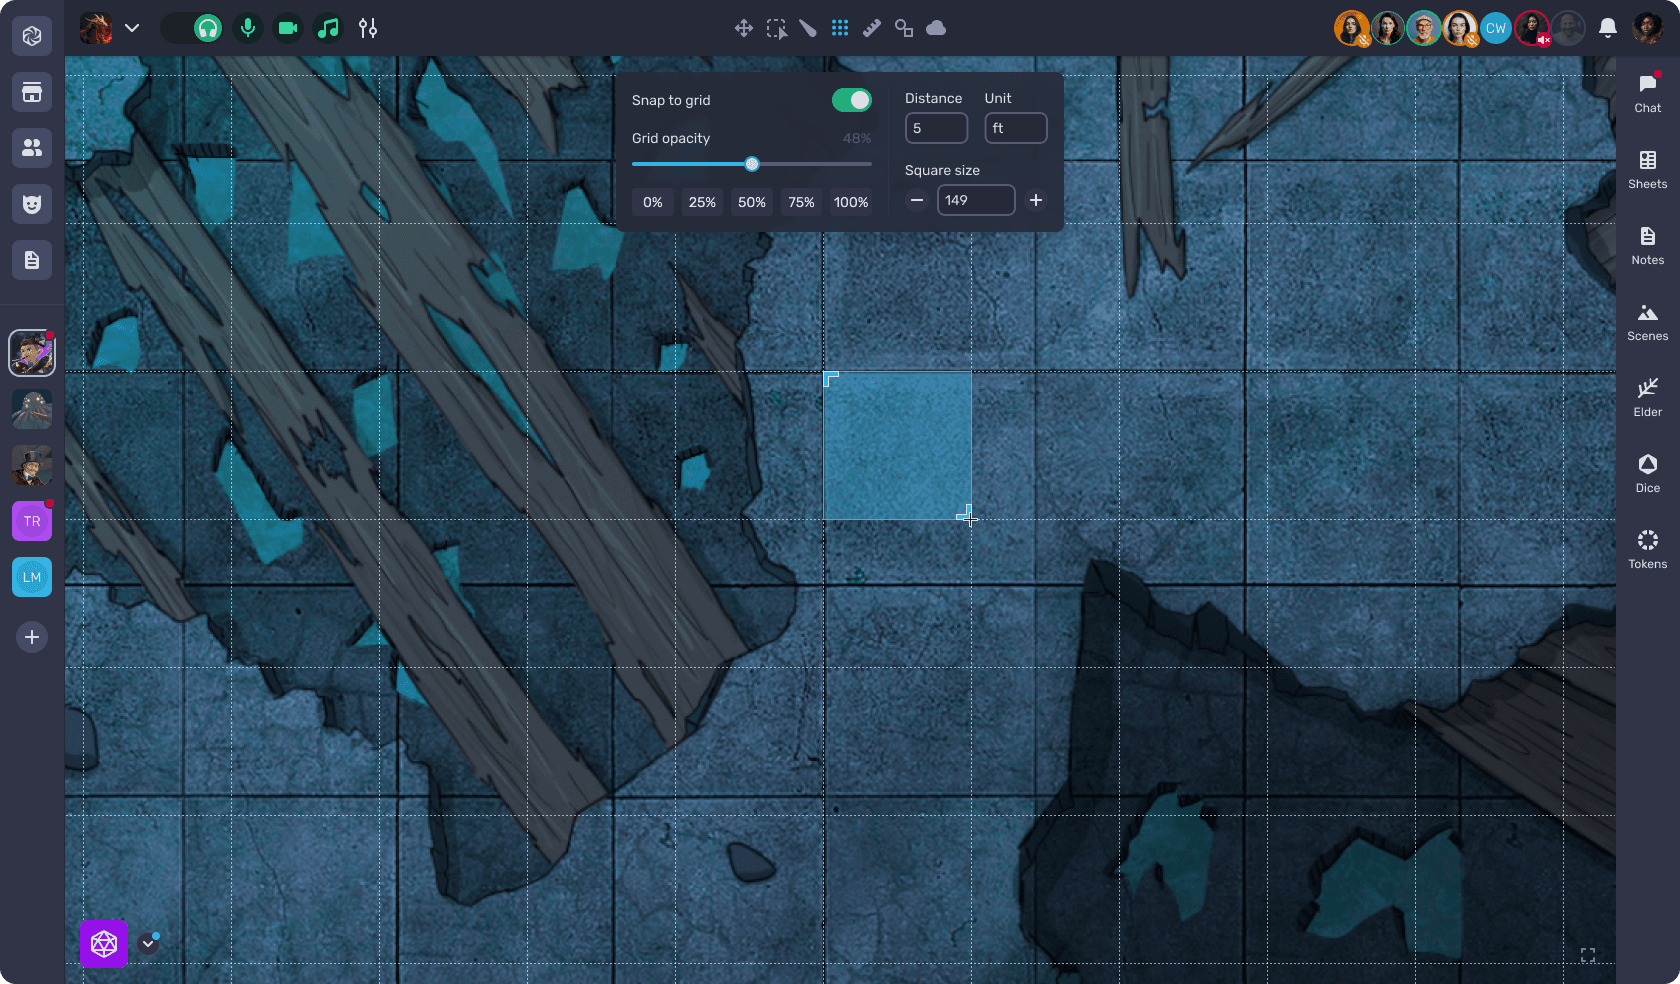
When you click the Grid icon you will see another menu appear. There you can choose certain settings that should apply to the grid, such as the opacity of the lines, the size of each grid, and the units used to measure.
You will also see a blue box appear on your map. You can use this box to align the grid lines to any existing grid lines. Move the box around as you please and resize it to make it perfect. If you need to adjust by a pixel or two, use the size option in the grid submenu.
Applying a correct grid is important since it affects the measurements in the Measure tool and the size of the tokens when they are added to the map.
Measure, select, and move
The other map tools available allow you to measure distances - the Measure tool ('M' keyboard shortcut), select one or more tokens -the Select tool ('A' keyboard shortcut), and move tokens - the Move tool ('V' keyboard shortcut).
Drawing Tool
The ability to draw on your canvas, image or map is as easy as grabbing a paint brush.

Available to everyone in the session, with variable transparencies, color choices... with the Session Owner having one additional option: Clear.
To start, navigate to the Map Tools, and click the icon of a circle and square. The keyboard shortcut for this is D. This opening the Drawing Tool menu.
Set up the brush
You can create the brush you want with the following options. This affects all the other drawing tools with respect to the choices made.
- Size from a choice of 8
- Color from a choice of 12
- Transparency as a slider.
This affects your brush, lines and shapes!
Grab
Grab allows you to click on a drawn element (each single click of the Drawing Tool creates a single element). With this you can move elements around the canvas, as well as getting the option to delete an element.
GM Only - Erase
This tool is only available for the Session Owner / GM. This removes all drawn elements from the current canvas.